Account Authentication
Authenticate a Tugboat account
When you create a Tugboat account, you have a few different ways to authenticate:
Add authentication methods to a Tugboat account
After you have created a Tugboat account, you can add more forms of authentication:
- Connect more git provider accounts
- Add a password to your email-based login
- Enable two-factor authentication for your email-based login
Change or update authentication
If you want to change an authentication method, you can:
Disconnect an authentication method
Finally, to remove or disconnect an authentication method:
- Disconnect a connected git provider account
- Disable two-factor authentication for your email-based login
- Disable your traditional password
Sign in using a git provider account
For instructions on how to sign into Tugboat using a git provider account, which for many people is the default way of creating a Tugboat account, view our Connect with your provider page. Or for provider-specific instructions, jump right to:
To connect with a generic git server, you’ll first need to sign into Tugboat using an email address.
Sign in using an email address
To sign into Tugboat using an email address:
- Go to the Sign In link (or if this is your first time using Tugboat, go to Create a Free Account).
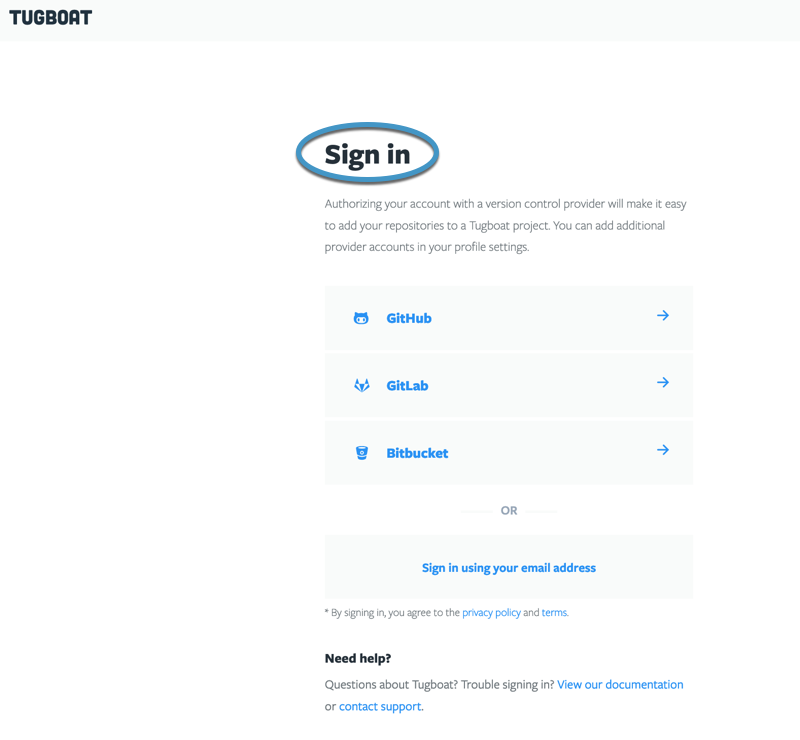
- You’ll be taken to the Tugboat Dashboard, where you should see a Sign in pane.
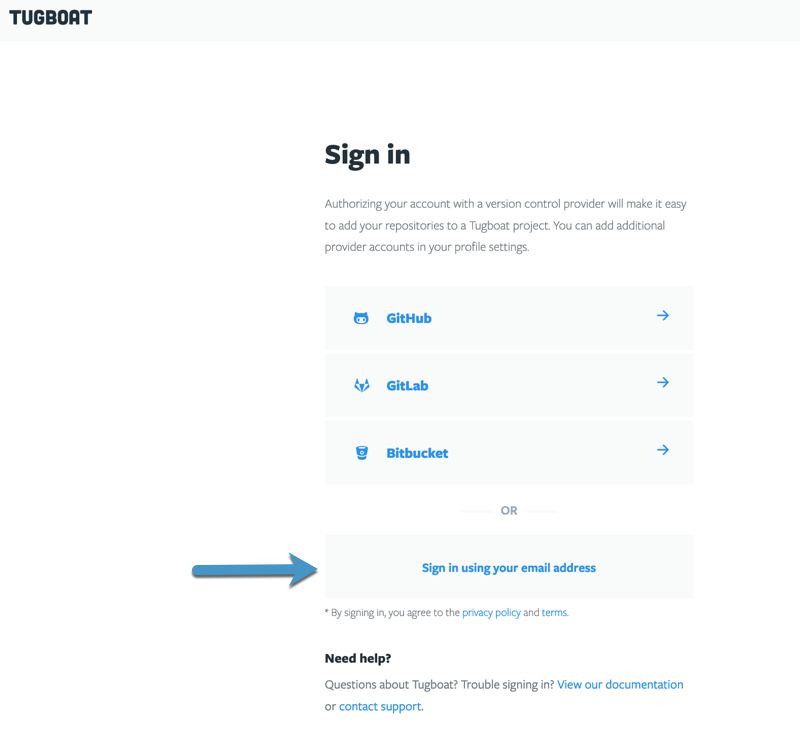
- Click the Sign in using your email address button.
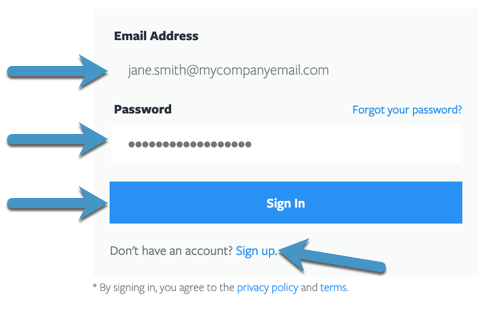
- Enter your Email Address and Password, and press the Sign In button - or if you haven’t signed in with an email address before, click the Sign up link and follow the account creation instructions.
Info
If you are already signed into Tugboat via a connected git provider, you’ll need to go to username -> Sign Out at the upper right corner of the Tugboat dashboard in order to see the Sign in pane.
Visual Walkthrough
Go to the Sign In link (or if this is your first time using Tugboat, go to Create a Free Account).

You’ll be taken to the Tugboat Dashboard, where you should see a Sign
in
Click the Sign in using your email address button.
Enter your Email Address and Password, and press the Sign In button - or if you haven’t signed in with an email address before, click the Sign up link and follow the account creation instructions.
Connect more git provider accounts
Whether you’ve authenticated via a git provider account or an email account, you can always connect additional git provider accounts to your Tugboat account. We’ve covered that process in: Connect with your provider -> Adding a link to a git provider.
Add password to email-based login
If you signed up for a Tugboat account by authenticating with a git provider account, you won’t have a traditional password on your Tugboat account. As a security best practice, we recommend adding a password to your Tugboat account.
To add a password for email-based login:
- Click the User drop-down in the upper right-hand corner of the Tugboat dashboard, and select Profile.
- Go to the Password section of the User Profile, and click Enable.
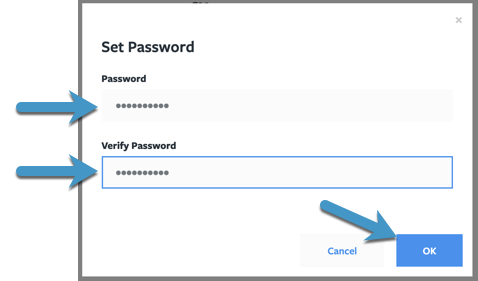
- Enter and Verify the password you want to use, and press the OK button.
Visual Walkthrough
Click the User drop-down in the upper right-hand corner of the Tugboat dashboard, and select Profile.

Go to the Password section of the User Profile, and click Enable.

Enter and Verify the password you want to use, and press the OK button.
Enable two-factor authentication for email-based login
Once you have set a password for your email-based login, you’ll have the option to enable two-factor authentication for your Tugboat account.
To enable two-factor authentication on your Tugboat account:
- Click the User drop-down in the upper right-hand corner of the Tugboat dashboard, and select Profile.
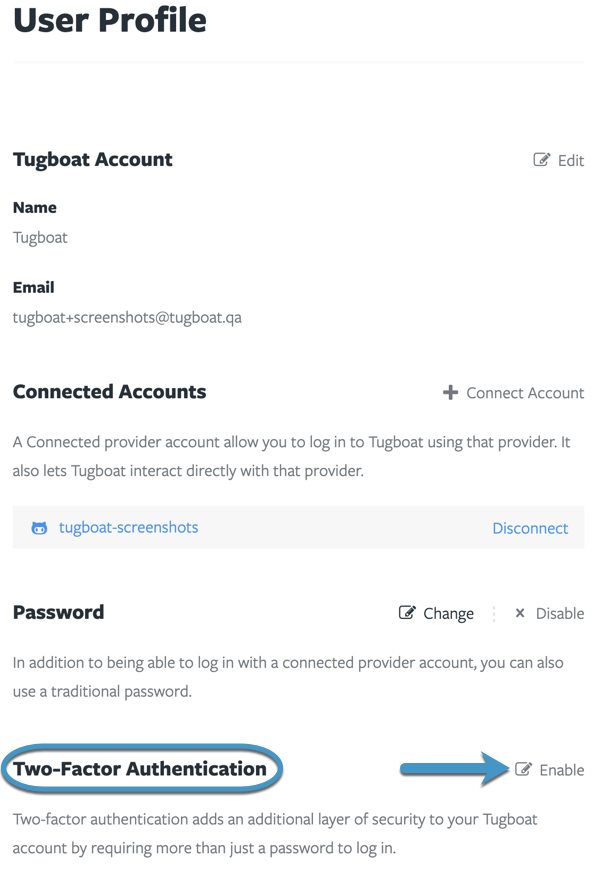
- Go to the Two-Factor Authentication section of the User Profile, and click Enable.
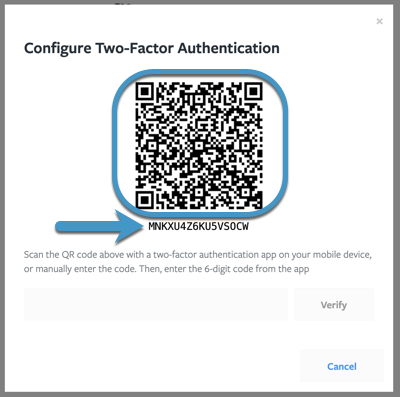
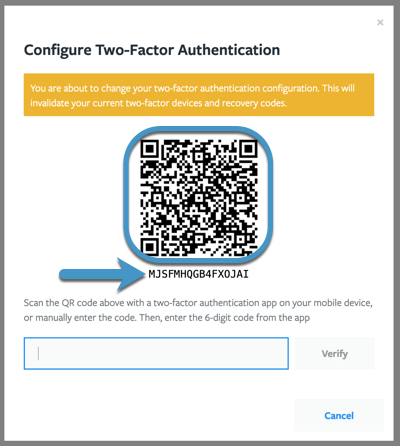
- Use a two-factor authentication app on your mobile device to scan the QR code, or manually enter the code into your preferred 2FA tool.
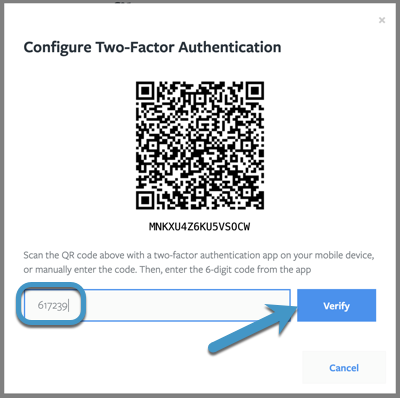
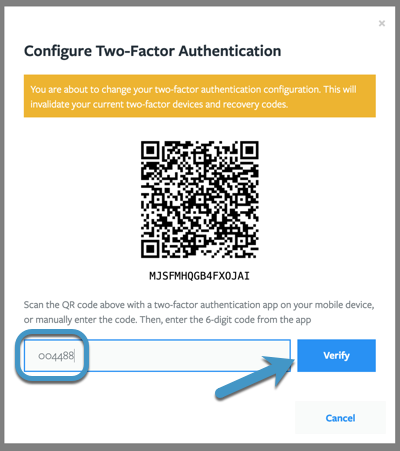
- Enter the 6-digit code from your two-factor authentication app into the dialog box, and press the Verify button.
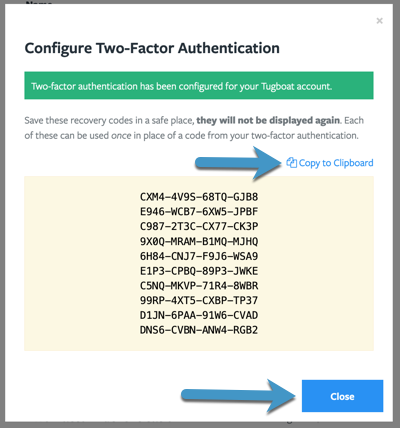
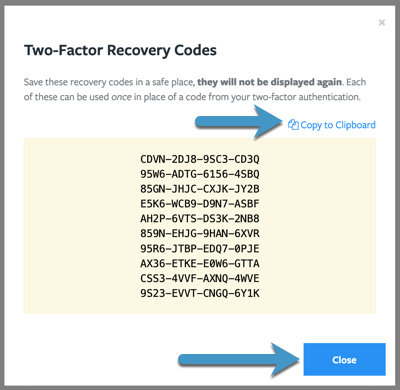
- You’ll see a list of recovery codes for your account. You can use the Copy to Clipboard link to copy the codes. Make sure you save these in a safe place, as they will not be displayed again. Press the Close button once you’ve saved the codes.
Visual Walkthrough
Click the User drop-down in the upper right-hand corner of the Tugboat dashboard, and select Profile.
Go to the Two-Factor Authentication section of the User Profile, and click Enable.
Use a two-factor authentication app on your mobile device to scan the QR code, or manually enter the code into your preferred 2FA tool.
Enter the 6-digit code from your two-factor authentication app into the dialog box, and press the Verify button.
You’ll see a list of recovery codes for your account. You can use the Copy to Clipboard link to copy the codes. Make sure you save these in a safe place, as they will not be displayed again. Press the Close button once you’ve saved the codes.
Change your password
To change the password on your Tugboat account:
- Click the User drop-down in the upper right-hand corner of the Tugboat dashboard, and select Profile.
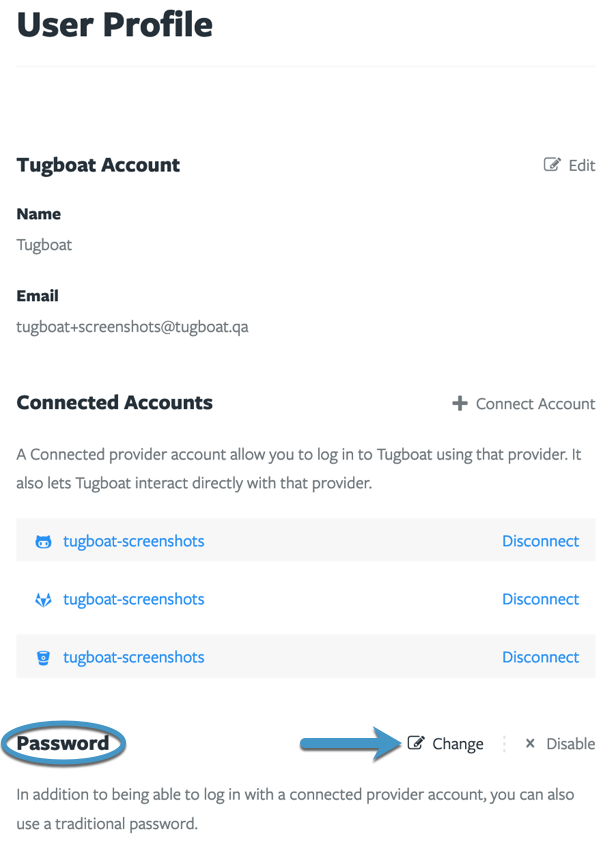
- Go to the Password section of the User Profile, and click Change.
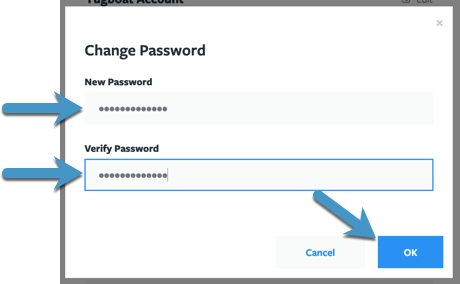
- Enter and Verify your new password, and press the OK button.
Visual Walkthrough
Click the User drop-down in the upper right-hand corner of the Tugboat dashboard, and select Profile.
Go to the Password section of the User Profile, and click Change.
Enter and Verify your new password, and press the OK button.
Reconfigure two-factor authentication
To reconfigure two-factor authentication for your Tugboat account:
- Click the User drop-down in the upper right-hand corner of the Tugboat dashboard, and select Profile.
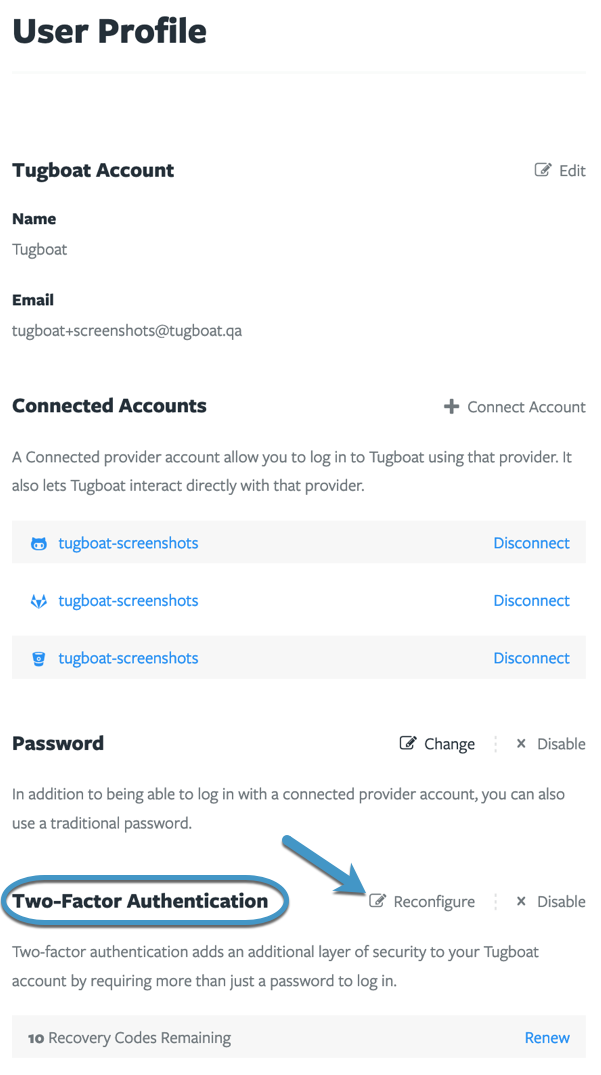
- Go to the Two-Factor Authentication section of the User Profile, and click Reconfigure.
- Use a two-factor authentication app on your mobile device to scan the QR code, or manually enter the code into your preferred 2FA tool.
- Enter the 6-digit code from your two-factor authentication app into the dialog box, and press the Verify button.
- You’ll see a list of recovery codes for your account. You can use the Copy to Clipboard link to copy the codes. Make sure you save these in a safe place, as they will not be displayed again. Press the Close button once you’ve saved the codes.
Visual Walkthrough
Click the User drop-down in the upper right-hand corner of the Tugboat dashboard, and select Profile.
Go to the Two-Factor Authentication section of the User Profile, and click Reconfigure.
Use a two-factor authentication app on your mobile device to scan the QR code, or manually enter the code into your preferred 2FA tool.
Enter the 6-digit code from your two-factor authentication app into the dialog box, and press the Verify button.
You’ll see a list of recovery codes for your account. You can use the Copy to Clipboard link to copy the codes. Make sure you save these in a safe place, as they will not be displayed again. Press the Close button once you’ve saved the codes.
Renew two-factor authentication codes
If you forgot to save your two-factor authentication codes, or have used them all and want new ones, you can use Renew to generate new codes.
To renew two-factor authentication codes for your Tugboat account:
- Click the User drop-down in the upper right-hand corner of the Tugboat dashboard, and select Profile.
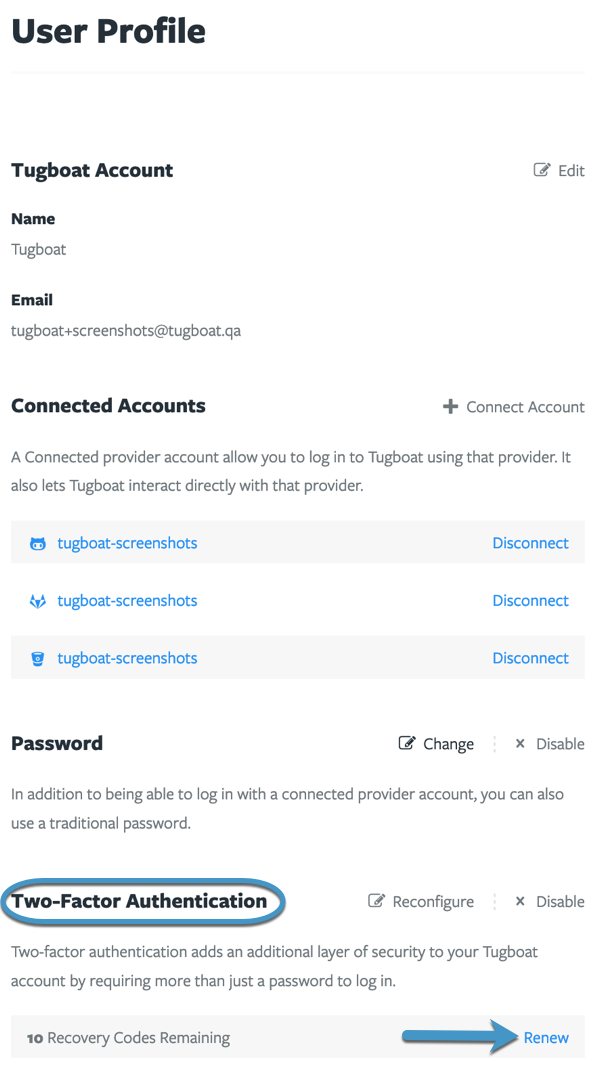
- Go to the Two-Factor Authentication section of the User Profile, and click Renew.
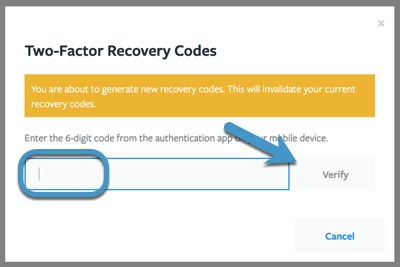
- Open your two-factor authentication app, and enter the 6-digit code from it into the Tugboat dialog box.
- Enter the 6-digit code from your two-factor authentication app into the dialog box, and press the Verify button.
- You’ll see a new list of recovery codes for your account. You can use the Copy to Clipboard link to copy the codes. Make sure you save these in a safe place, as they will not be displayed again. Press the Close button once you’ve saved the codes.
Visual Walkthrough
Click the User drop-down in the upper right-hand corner of the Tugboat dashboard, and select Profile.
Go to the Two-Factor Authentication section of the User Profile, and click Renew.
Enter the 6-digit code from your two-factor authentication app into the dialog box, and press the Verify button.
You’ll see a new list of recovery codes for your account. You can use the Copy to
Clipboard
Disconnect a connected git provider account
Do you need to disconnect a git provider account that is linked to your Tugboat account? Take a look at: Connect with your provider -> Disconnect a linked git provider.
Disable two-factor authentication for email based login
- Click the User drop-down in the upper right-hand corner of the Tugboat dashboard, and select Profile.
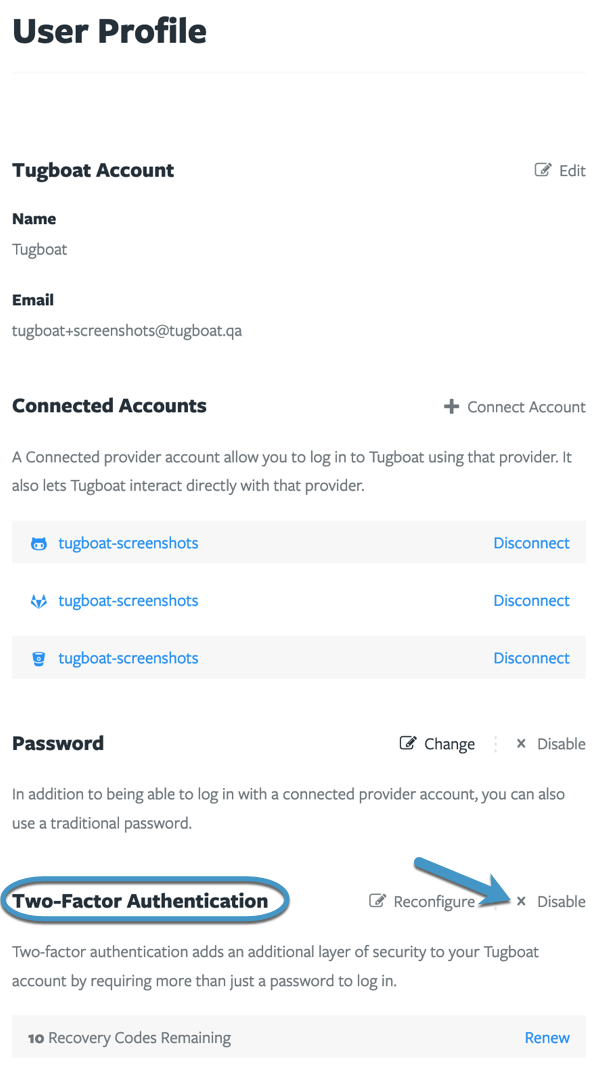
- Go to the Two-Factor Authentication section of the User Profile, and click Disable.
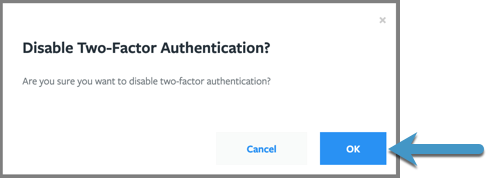
- You’ll see a dialog box asking you to confirm you want to turn off two-factor authentication. Press the OK button.
Visual Walkthrough
Click the User drop-down in the upper right-hand corner of the Tugboat dashboard, and select Profile.
Go to the Two-Factor Authentication section of the User Profile, and click Disable.
You’ll see a dialog box asking you to confirm you want to turn off two-factor authentication. Press the OK button.
Disable traditional password
If you no longer want to use your email address to login to your Tugboat account, you can disable the traditional password on your account. When you disable the password on your Tugboat account, you can only login to Tugboat via a connected git provider account.
To disable the password on your Tugboat account:
- Click the User drop-down in the upper right-hand corner of the Tugboat dashboard, and select Profile.
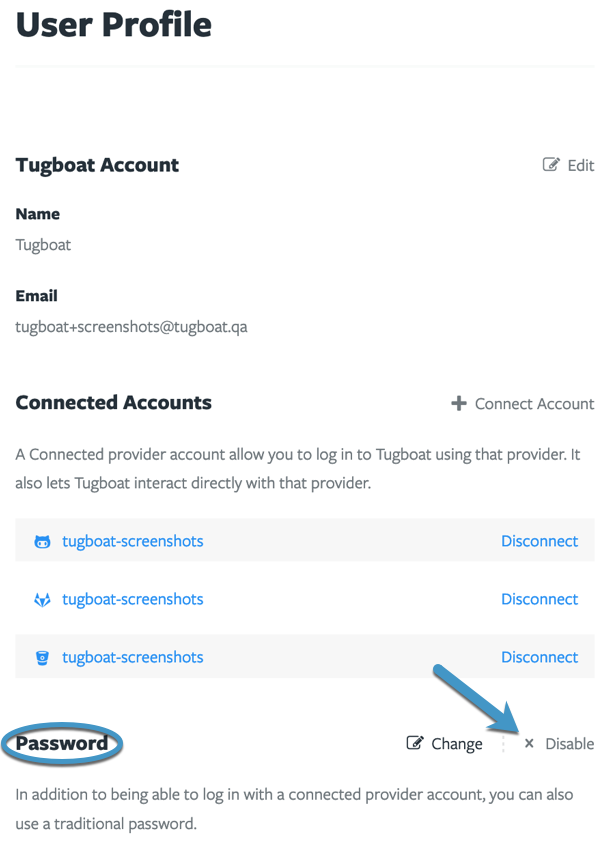
- Go to the Password section of the User Profile, and click Disable.
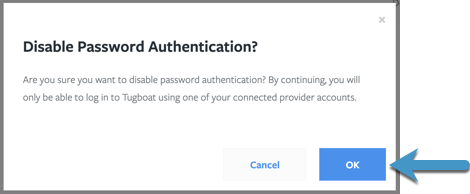
- You’ll see a dialog box asking you to confirm you want to disable your password. Press the OK button.
Visual Walkthrough
Click the User drop-down in the upper right-hand corner of the Tugboat dashboard, and select Profile.
Go to the Password section of the User Profile, and click Disable.
You’ll see a dialog box asking you to confirm you want to disable your password. Press the OK button.